Grow Tomatoes Like a PRO
Disclaimer:
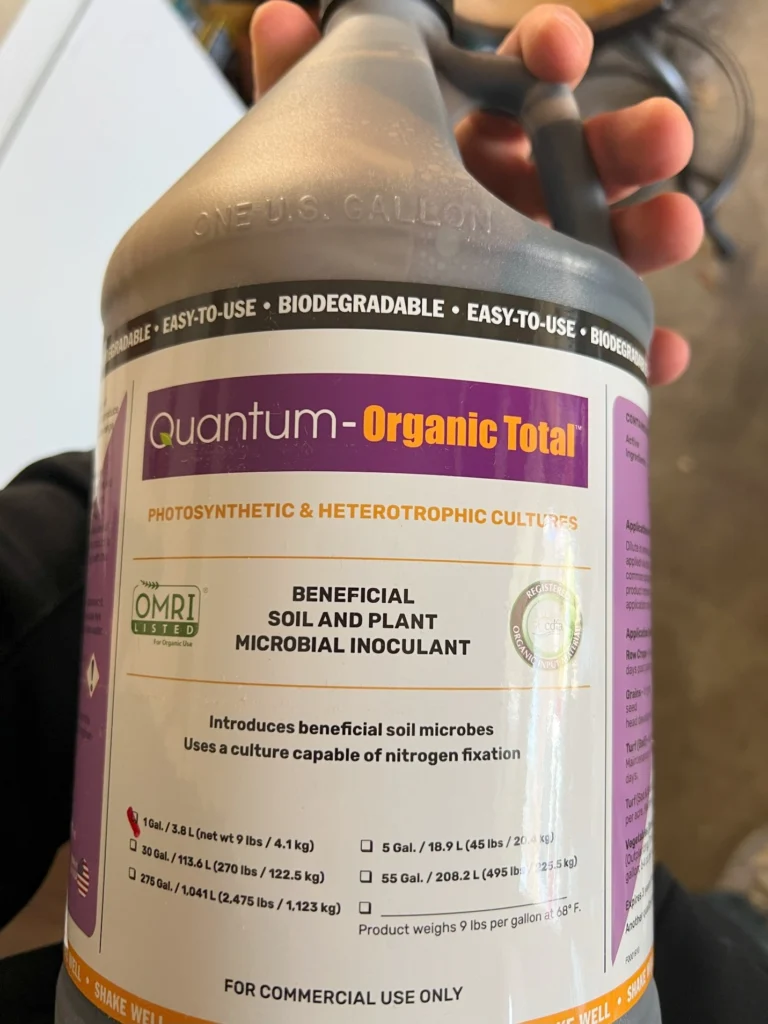
Included in this article are links to some products. The only product linked in this article that we sell is Quantum -Organic Total. The other products are listed and linked because I personally use and recommend them.
Introduction
I generally prefer to grow heirloom tomatoes. This is a preference rather than some endorsement. The traits of bush varieties of tomatoes were bred into tomatoes more recently for commercialization. These are determinate tomatoes. There are indeterminate hybrids, and the method for growing any indeterminate tomatoes is the same.
The reason I prefer indeterminate tomatoes, specifically is for space. It is possible to fit twice as many indeterminate tomatoes in the same space, using the methods outlined below. So, if you are looking to increase your yield, I highly recommend using at least some of the ideas in this article.
Growing indeterminate tomatoes vertically using a string support system, combined with proper pruning and the use of beneficial microbes, can maximize space, improve plant health, and increase fruit quality. This comprehensive guide will walk you through the steps of setting up a string support system, training your tomato plants, pruning them effectively, and incorporating beneficial microbes to ensure a bountiful harvest.
Materials Needed
- Tomato seedlings (indeterminate varieties)
- Determinate tomatoes grow in a bush. This article is for vining or indeterminate varieties.
- String or twine (preferably biodegradable)
- Sturdy stakes or overhead support system
- Clips or plant ties
- Pruning shears or scissors
- Gloves
- Beneficial microbes such at Quantum-Organic Total
Step-by-Step Guide
1. Preparing the Planting Site
- Choose the Right Location: Tomatoes need full sun for at least 6-8 hours a day. Ensure the planting site has good drainage and fertile soil.
- Soil Preparation:
- Amend the soil with compost or well-composted manure. A pH between 6.0 and 7.0 is ideal for tomatoes. You can test the soil and adjust accordingly.
- Introduce Beneficial Microbes: If starting tomatoes from seed, inoculate with Quantum-Organic Total at time of germination. If planting seedlings from a greenhouse or garden center, water with Quantum-Organic Total at time of transplantation.
- Plant Spacing: Space indeterminate tomato plants about 18-24 inches apart. This will allow sufficient room for growth and air circulation.
2. Installing the Support System
- Overhead Support System:
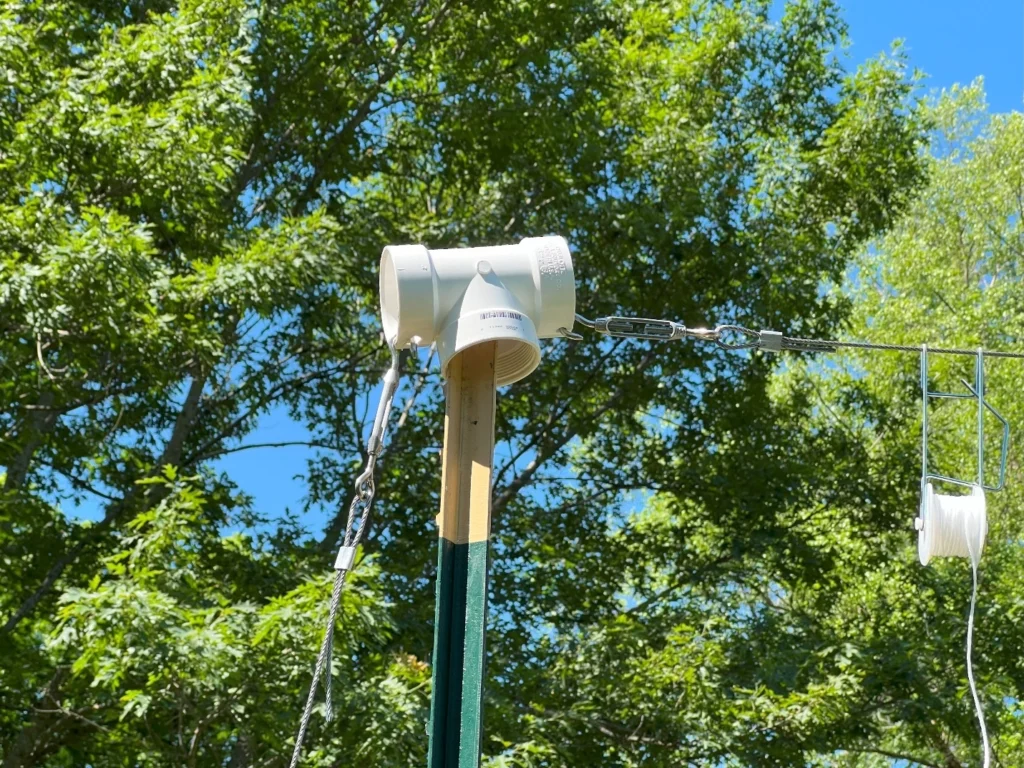
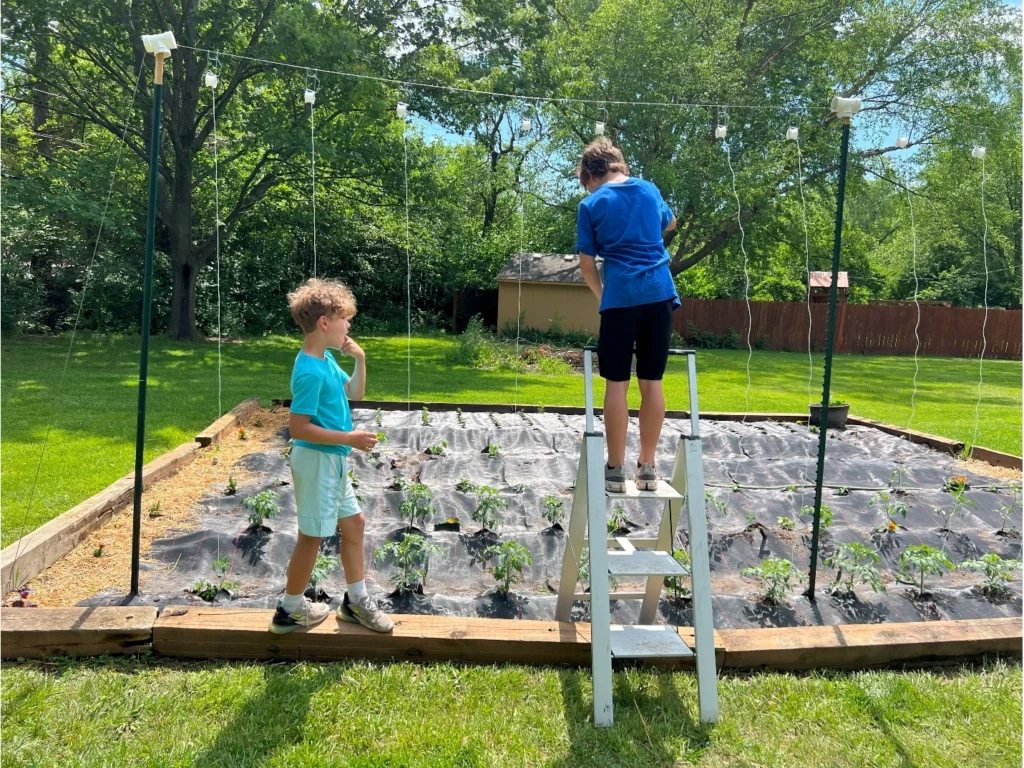
- Set up a horizontal bar or wire above the planting row, about 6-8 feet high. This can be supported by strong posts at either end of the row. In our small market garden, we used T-Posts topped with 1.5” PVC Tees. We drilled holes in the pipe fittings to hook our turnbuckles. These are necessary to keep the overhead wire tight enough not to sag.
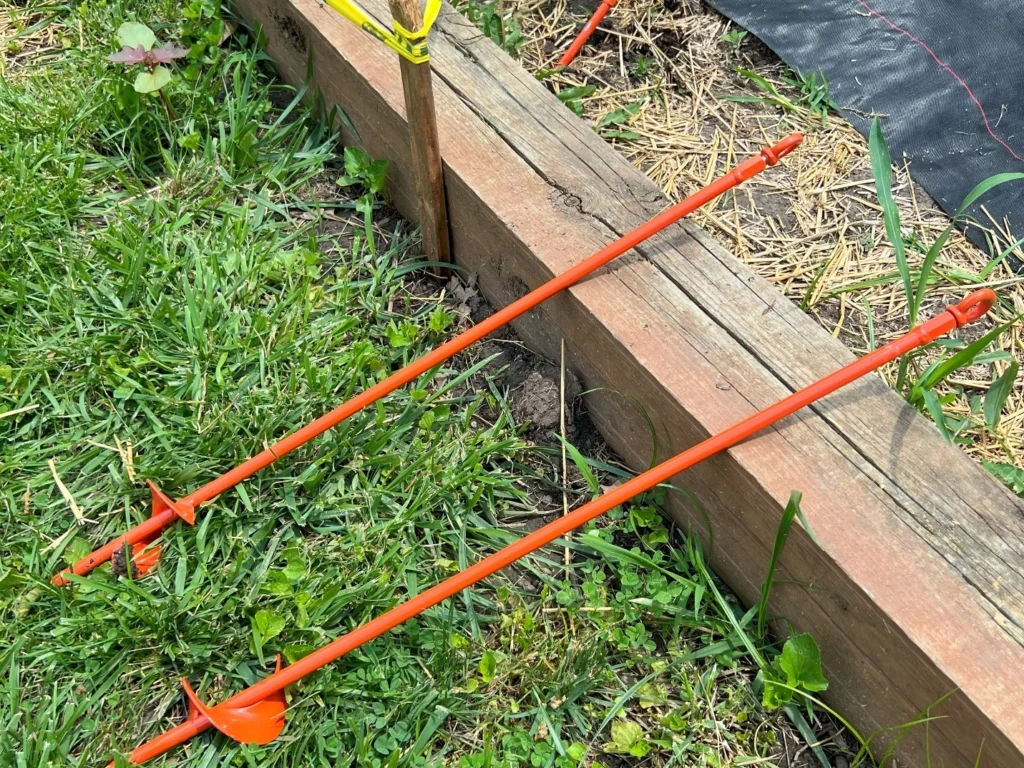
- Place ground anchors at the end of each row. For ours, we needed 30″ heavy duty anchors to keep our end posts from leaning in, causing the cable to sag. We then connect a length of cable from the anchors to the posts. This pulls the end posts out while the tension of the overhead cable is pulling them in making everything very stable. We used 1/8″ steel cable with about 14 plants per row spaced 18″ apart. Â
2. String Attachment:
- While tying strings to the overhead wire from the base of the tomato will work fine, we went with Rollerhooks (which are commonly used in commercial greenhouses) due to their ease of use, ability to get better string tension, and reusability.
- To use Rollerhooks:
- Hook the spool to the overhead cable.
- Let out enough string to reach the base of the plant (with a little extra for tying).
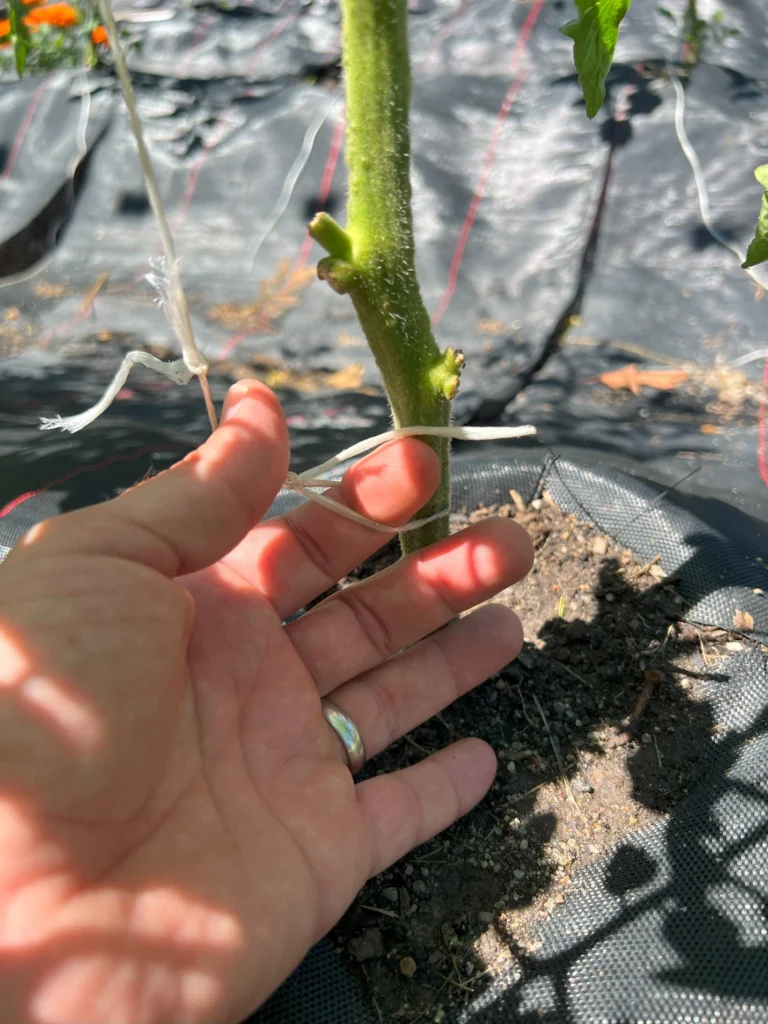
- Tie the string with a non-slip not to the base of the stem. Ensure that the loop is big enough to provide for the future growth of the stem diameter. If the string is too tight, the tomato will outgrow the loop.
- Lastly, roll the spool so that the string is as tight as can be without pulling up of the plant. The spool is geared like a ratchet, so it will lock in place.
3. Planting the Tomatoes
- Transplanting:
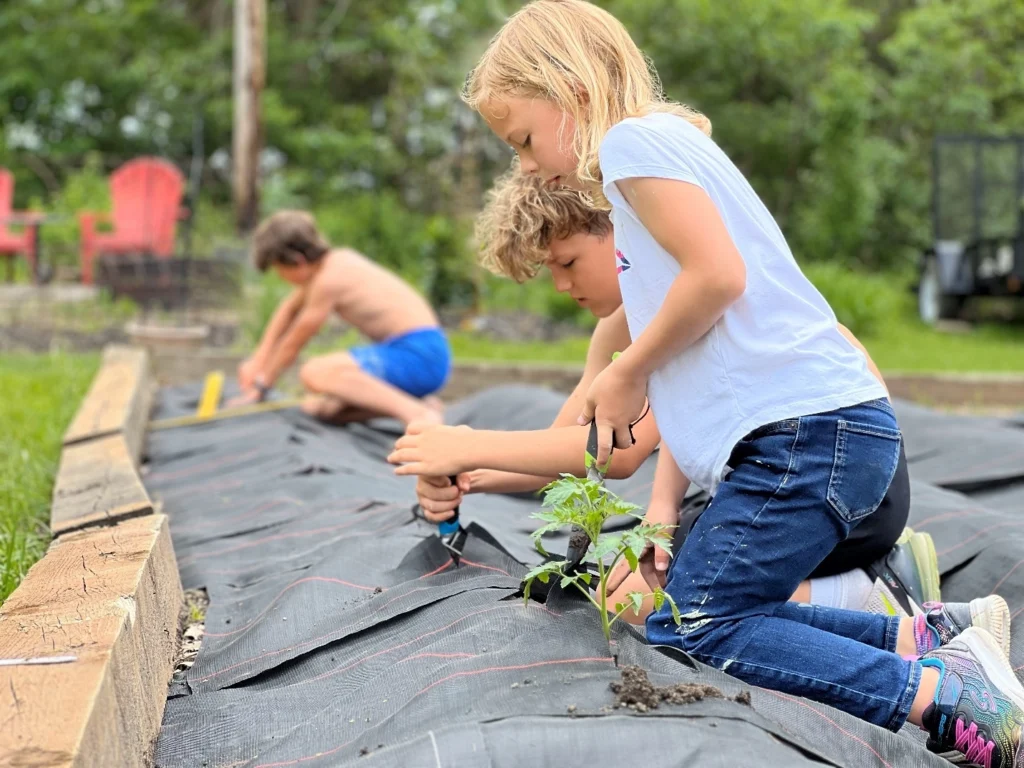
- Plant the tomato seedlings deep into the soil, burying two-thirds of the stem. This encourages a strong root system since the hairs you might notice on the stem will grow into new roots when in contact with soil.
- Apply Beneficial Microbes: At the time of planting, mix Quantum-Organic Total as directed and water directly into the planting hole. This ensures the roots come into immediate contact with the microbes. I have even known people who prefer to dunk the root ball in a bucket with microbes before setting the plant into the hole.
- Initial Watering:
- Water the plants well after transplanting to help them settle in and reduce transplant shock.
4. Training the Plants Up the String
- Tying the Plant:
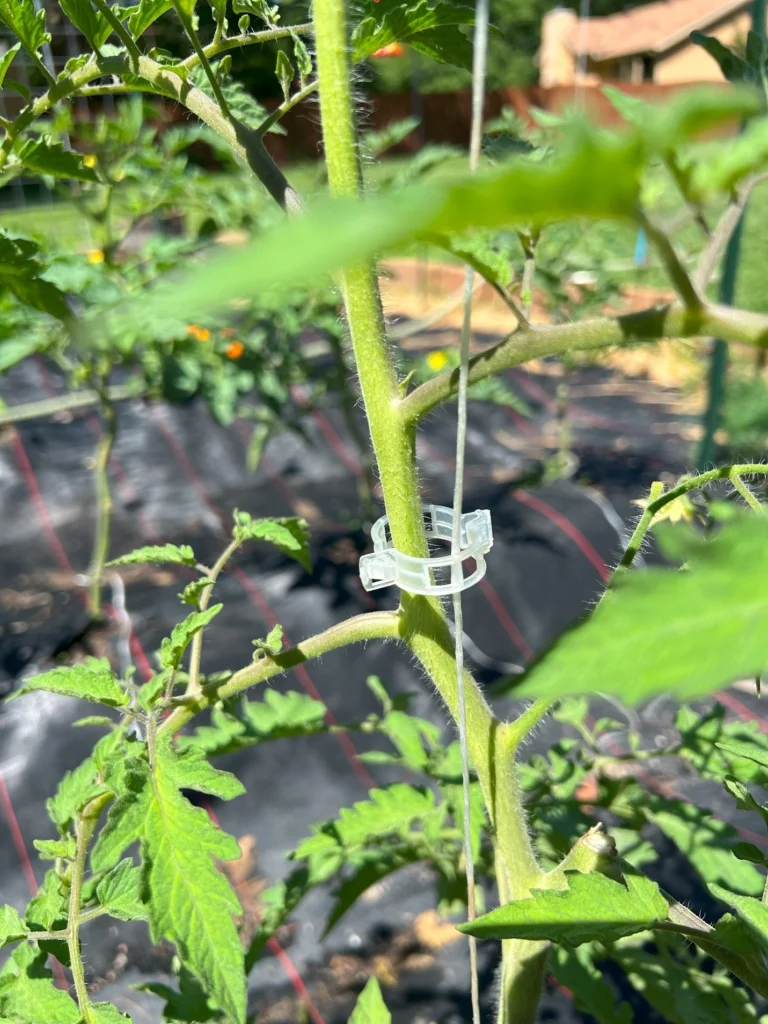
- As the plant grows, gently wind the main stem around the string or tie it loosely using clips or plant ties. Make sure the ties are not too tight to avoid damaging the stem. Dalzom Tomato clips are easier than ties as they do not get too tight and are easy to affix without damaging the plant.
2. Regular Adjustments:
- Continue to tie the plant to the string or wind it around as it grows taller. This should be done regularly, to keep the plant upright and supported. Depending on the vigor of your plants, this needs to be checked as often as necessary for your individual situation.
5. Pruning the Tomato Plants
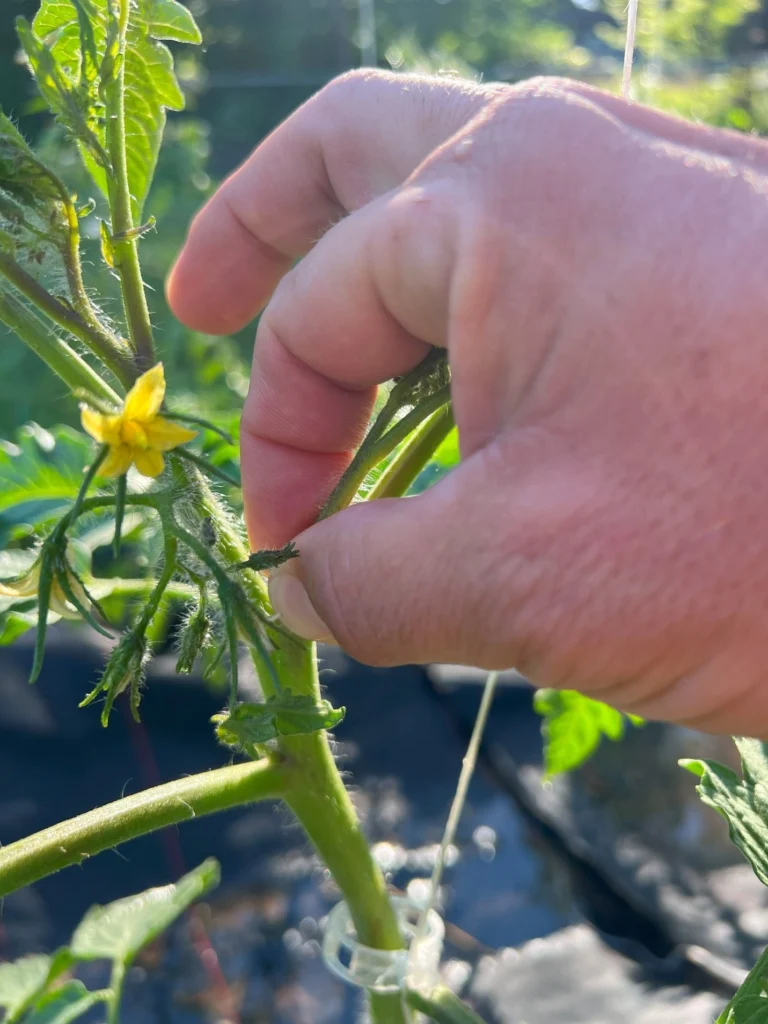
- Identify the Suckers:
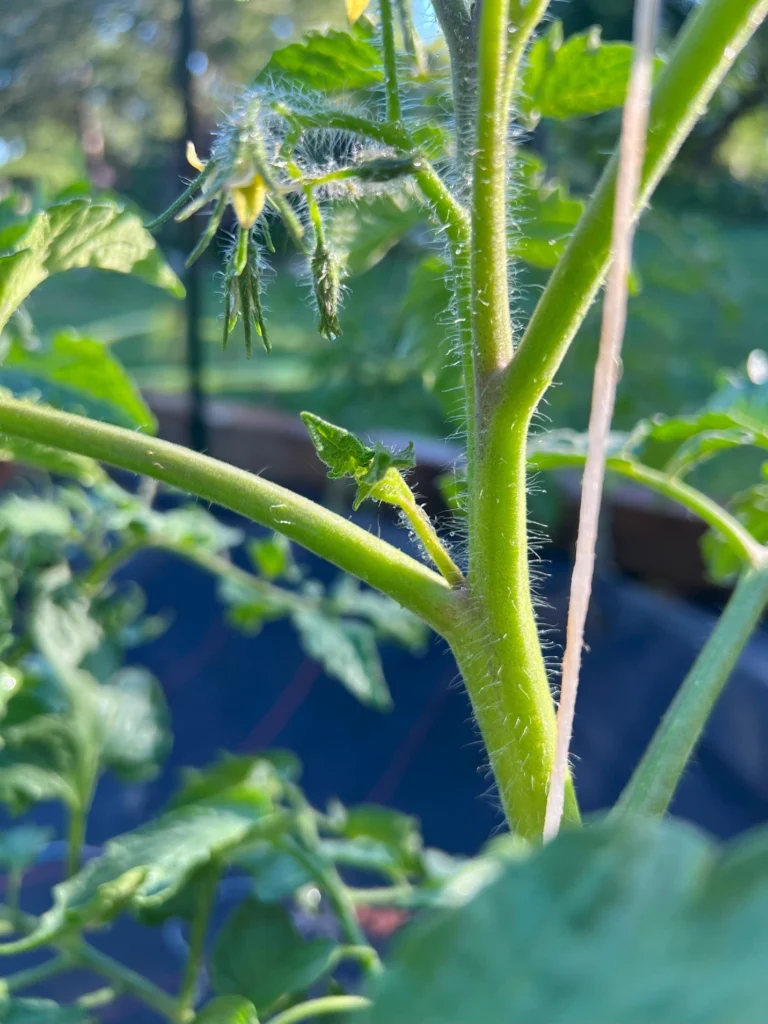
- Suckers are the shoots that grow in the leaf axils, the junction between the main stem and a leaf branch. These should be removed to direct the plant’s energy towards fruit production.
2. Removing Suckers:
- Using your fingers or pruning shears, pinch or cut off the suckers when they are small (about 2-4 inches long). This can be done weekly or as you see new suckers developing.
3. Lower Leaves:
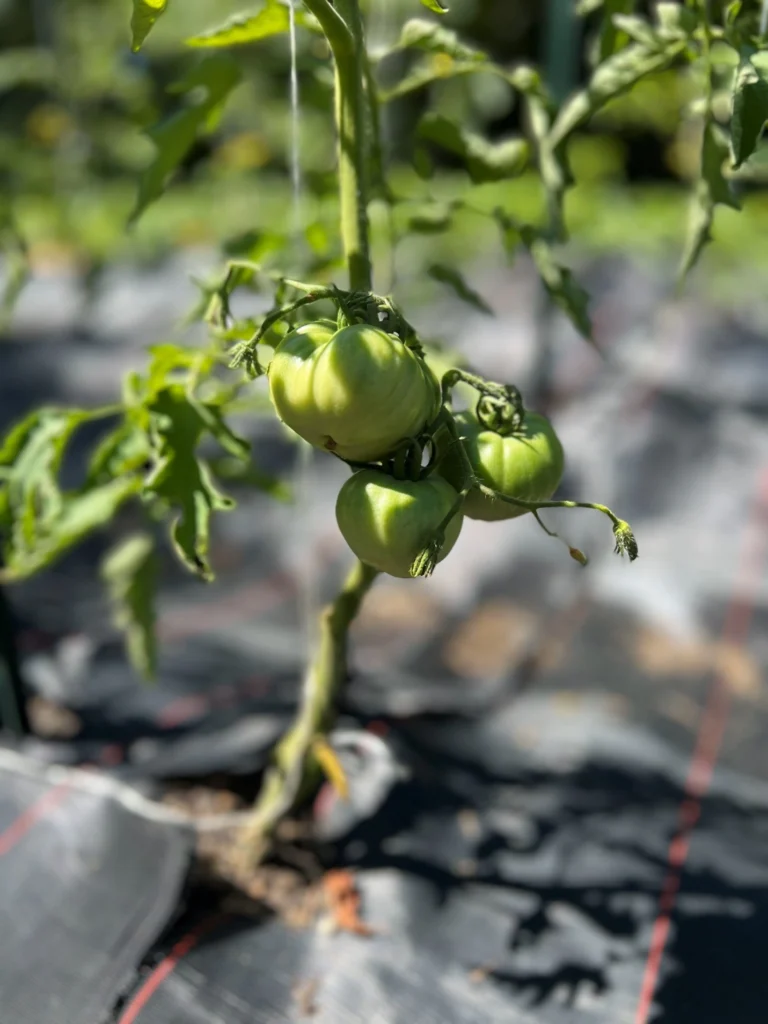
- Remove the lower leaves of the plant up to the first fruit cluster. This improves air circulation and reduces the risk of disease.
- This will also ensure the first stop up the vine for nutrients is your first fruit cluster. This will make your tomatoes bigger, and ripen faster.
4. Topping the Plant:
- When the plant reaches the desired height or when the growing season is nearing its end, you can top the plant by cutting off the growing tip. This encourages the plant to focus on ripening the existing fruits.
6. Incorporating Beneficial Microbes into Ongoing Care
- Soil Drenches:
- Once every 3-4 weeks apply Quantum-Organic Total as a soil drench around the base of the plants. This supports root health and helps maintain a healthy soil microbiome.
- Foliar Sprays:
- Use microbial foliar sprays to enhance plant immunity and suppress foliar diseases. Simply mix Quantum-Organic Total as directed into a spray bottle or pump sprayer. Apply in the early morning for best results.
7. General Care Tips
- Watering:
- Water the plants deeply and consistently. Avoid overhead watering to minimize the risk of fungal diseases. Drip irrigation or soaker hoses are ideal.
- Mulching:
- Apply a layer of mulch around the base of the plants to retain soil moisture, regulate temperature, and reduce weed growth. Mulch also provides a habitat for beneficial microbes.
- Mulching to reduce weeds can also be accomplished with newspaper, cardboard, plastic mulch, or grass clippings.
- Fertilizing:
- Use a balanced fertilizer or one specifically formulated for tomatoes. Follow the manufacturer’s instructions for application rates and frequency.
- Pest and Disease Management:
- Regularly inspect the plants for signs of pests and diseases. Use organic or chemical controls as necessary, following integrated pest management (IPM) practices.
Common Mistakes to Avoid
- Over-Pruning:
- While pruning is beneficial, over-pruning can stress the plant and reduce yields. Aim to remove only the necessary suckers and leaves.
- Improper Tying:
- Tying the plant too tightly can damage the stem. Ensure ties are loose and allow for stem growth.
- Inconsistent Watering:
- Irregular watering can lead to problems like blossom end rot. Maintain a consistent watering schedule.
- Ignoring Disease Signs:
- Early detection of diseases like blight can save your crop. Regularly inspect plants and take action at the first sign of trouble. Using Agricultural Hydrogen Peroxide can kill soil borne fungi while also oxygenating the roots. Just remember to use Quantum-Organic Total as a soil drench soon after application to rebuild healthy microbial populations.
- Neglecting Microbe Health:
- Avoid using chemical fertilizers and pesticides that can harm beneficial microbes. Opt for organic options when possible. Pro’s know that some organic solutions are for pest management can be hit or miss. Just ensure that you are continuing to replenish microbial populations after the use of any chemicals that might harm them.
Troubleshooting
- Yellowing Leaves:
- This can be a sign of overwatering, nutrient deficiency, or disease. Check soil moisture levels and consider a soil test.
- Blossom Drop:
- Often caused by high temperatures, poor pollination, or nutrient imbalances. Ensure plants are well-watered and consider using a balanced fertilizer.
- End Rot:
- This is a problem caused (most often) by a lack of watering which does not allow nutrients to extend to plant extremities. This can also be a nutrient deficiency, but try watering more before buying a bunch of amendments.
- Slow Growth:
- May result from poor soil conditions, insufficient sunlight, or lack of nutrients. Improve soil fertility and ensure plants get enough light.
Harvesting
- When to Harvest:
- Tomatoes are ready to harvest when they reach their full color and are slightly firm to the touch. For the best flavor, allow them to ripen on the vine.
- How to Harvest:
- Use scissors or pruning shears to cut the stem just above the fruit to avoid damaging the plant.
- Storing Tomatoes:
- Store harvested tomatoes at room temperature out of direct sunlight. Refrigeration can reduce flavor and texture. Check back for a blog post about home canning!
In conclusion, training indeterminate tomatoes up a string and pruning them correctly, while incorporating beneficial microbes, can lead to healthier plants and more abundant harvests. By following this step-by-step guide, you’ll be able to maximize your garden space, improve soil and plant health, and enjoy delicious, homegrown tomatoes throughout the growing season. Remember to regularly monitor your plants, make necessary adjustments, and enjoy the process of cultivating your own food. Happy gardening!

